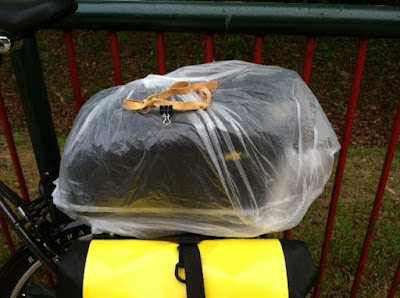
Took off an hour to go to Performance Bikes. Caught one train earlier. Lucky it was not full so the conductor let me ride in the entryway.
Great way to start the weekend.
Friday, April 20, 2012
Wednesday, April 18, 2012
Guaranteed Camping for Touring Cyclists at Virginia State Parks
April 1, 2012
The Virginia State Park System has announced a new policy showing that long distance touring cyclists are always welcome in Virginia’s award winning parks. Beginning today, Virginia’s state parks will designate areas for cyclists to camp even when campgrounds are full, to ensure that long-distance touring cyclists will always have a place to stay.
complete story
State Park Policy Letter
Tuesday, April 17, 2012
Review of the Best Bicycle Tail Lights in 2012
I came across this amazing rear tail light review. If you ride at night or want to be seen during the day, check out this link.
http://bicycles.blogoverflow.com/2012/03/tail-light-review/
http://bicycles.blogoverflow.com/2012/03/tail-light-review/
Sunday, April 15, 2012
Planet Bike, Hardcore Hybrid Fender Installation
I bought a set of Planet Bike Hardcore Hybrid fenders for my commuting bike, a Trek 520. I want to be an all-weather bike commuter and try and keep as much road wetness off the bike's drivetrain. It made sense to go with fenders.
As in most written instructions, you have to read between the lines. I hope my photos and extra details make your job easier. The instructions starts with a drawing of the front fender in place, over the tire, without giving you any hints on how to get it there.
I don't have a floor bike repair stand so I use my tow hitch bike rack to hold the 520 at a workable height.
I removed both of the wire stays and found the fender then fit right in place from the front. The small mud flap easily fit between the fork over the tire. I am also a firm believer in using Loctite thread retainer so I put a drop on each of the adjustment nuts even though they had nylon inserts.
I am going to ride the bike a while before I decide whether I will cut down the stays.
I also put some Loctite on the supplied bolt that goes through the fork crown. Leaving both the stay bolts and the crown bold just finger tight I was able to get the fender seated as high at possible.
I found it much easier to use a 9mm and 10mm nut driver along with a 10mm open end wrench while doing this install. I stayed away from a phillip screwdriver.
Here is a final front view of the finished installation. Once the fork crown bolt is tighted, I made the final adjustments on the stays. I also made sure the quick release tab were tight and Loctited.
Now to the rear fender. I started again by taking off all four stays. The fender then rolled right into place. I found it very easy to clip the plastic mounting clip in place after the fender was almost all the way in.
Loctite on the existing Trek allen head bolt and finger tighten.
It was then very easy to make sure the fender was rotated and seated all the way and clipped onto the frame cross member. I will take a wait and see attitude whether the fender moves and needs a bolt at that position. Not a lot of space between the tire and fender mount, so I will have to look for a Button head metric allen bolt if I add one
Sliding in the last four rear fender stays in place was the last step. I again used a drop on Loctite on all bolts. I found that I needed to have the lower stays on the outside, as two stays are mounted to the frame with one bolt.
This last rear photos shows the clearance between the Trek rear rack and the installed fender. I was so happy I didn't need to remove the rack. I did have to rotate the position of the rear axle skewer release so it cleared the stay mounting position on the left side.
I am very excited to find out how these fenders will hold up and how dry they will keep me in future commutes.
As in most written instructions, you have to read between the lines. I hope my photos and extra details make your job easier. The instructions starts with a drawing of the front fender in place, over the tire, without giving you any hints on how to get it there.
I don't have a floor bike repair stand so I use my tow hitch bike rack to hold the 520 at a workable height.
I removed both of the wire stays and found the fender then fit right in place from the front. The small mud flap easily fit between the fork over the tire. I am also a firm believer in using Loctite thread retainer so I put a drop on each of the adjustment nuts even though they had nylon inserts.
I also put some Loctite on the supplied bolt that goes through the fork crown. Leaving both the stay bolts and the crown bold just finger tight I was able to get the fender seated as high at possible.
I found it much easier to use a 9mm and 10mm nut driver along with a 10mm open end wrench while doing this install. I stayed away from a phillip screwdriver.
Here is a final front view of the finished installation. Once the fork crown bolt is tighted, I made the final adjustments on the stays. I also made sure the quick release tab were tight and Loctited.
Now to the rear fender. I started again by taking off all four stays. The fender then rolled right into place. I found it very easy to clip the plastic mounting clip in place after the fender was almost all the way in.
Loctite on the existing Trek allen head bolt and finger tighten.
It was then very easy to make sure the fender was rotated and seated all the way and clipped onto the frame cross member. I will take a wait and see attitude whether the fender moves and needs a bolt at that position. Not a lot of space between the tire and fender mount, so I will have to look for a Button head metric allen bolt if I add one
Sliding in the last four rear fender stays in place was the last step. I again used a drop on Loctite on all bolts. I found that I needed to have the lower stays on the outside, as two stays are mounted to the frame with one bolt.
This last rear photos shows the clearance between the Trek rear rack and the installed fender. I was so happy I didn't need to remove the rack. I did have to rotate the position of the rear axle skewer release so it cleared the stay mounting position on the left side.
I am very excited to find out how these fenders will hold up and how dry they will keep me in future commutes.
Saturday, April 14, 2012
Test Emailing A Post
I was sitting on the VRE, on my way home last night thanking the Lord for giving me the strength and fortified to commute via my bike and the VRE. I had just received a text from Stafford county stating that the I-95 bridge over the Rappahannock River was down to only one lane. Some poor soul was considering suicide.
Sunday, April 1, 2012
Ready For The Open Road
Wow!! March!! What a month. A new job and new method of commuting, VRE train and bicycle.
324 commuting bicycle miles. I thought I was starting out slow by riding twice my second week of work, then three times, then four times and last week, every day. With just two, additional weekend rides, my highest monthly total for riding miles added up to 361.
My commute is 1.9 miles to the Leeland Road VRE station, about 40 minute train ride to Lorton and then a 7.3 mile, 35 minute ride to my office on Fort Belvoir. Including a shower, it is under 2 hours door to door. A no brainer because my employer helps pay for the public transportation. On the way home I have time to add a couple of miles enroute back to Lorton.
I am extra excited about this coming week as I will be breaking in my new touring/commute bike, a Trek 520. Here are the specs.
Colors Metallic Bronze
Frame Trek butted 520 chromoly
Fork Chromoly Touring w/lowrider mounts
Size 60cm
Wheels Shimano Deore hubs; Bontrager Camino alloy rims
Tires Bontrager Race Lite Hard-Case, 700x32c
Shifters Shimano Dura-Ace, bar end control, 9 speed
Front derailleur Shimano Deore LX
Rear derailleur Shimano Deore
Crank Shimano Trekking M543, 48/36/26
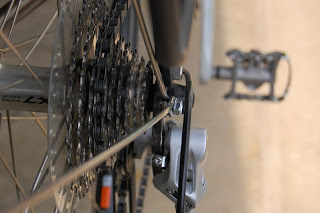
Cassette Shimano HG50 11-32, 9 speed
Pedals Nylon body w/alloy cage
Saddle Bontrager Evoke 1
Seatpost Bontrager Race Lite, 20mm offset
Handlebar Bontrager Race VR, 31.8mm
Stem Bontrager Race Lite, 7 degree, 31.8mm
Headset 1-1/8" threadless, sealed bearings
Brakeset Avid SD-5 brakes w/Tektro RL520 levers
Grips Bontrager gel tape w/Isogel padding
Extras Bontrager Back Rack Deluxe
(Click on any image to enlarge)
Ortlieb Back-Roller Classic waterproof panniers
Shimano PD-M324 pedals with SPD clips on one side
Shimano Dura-Ace, bar end control, 9 speed
Subscribe to:
Comments (Atom)


